Step 1: Logo & Business Name
- Upload your business logo by clicking the “Upload” button and selecting the saved logo file from your computer. We accept JPG, PNG, or SVG file types.
- Enter your business name and create your Custom URL. The URL checker will let you know if it’s available. You can add numbers, but no special characters.
- Once you’ve completed the required fields, click the “Continue” button at the bottom right to proceed to Step 2.
🐝 Hivey Tip: Include your business name in your Custom URL to make it easier for Vendors to recognize you when applying to your events! To get more information about the Custom URL, navigate to our How To section for Venues!

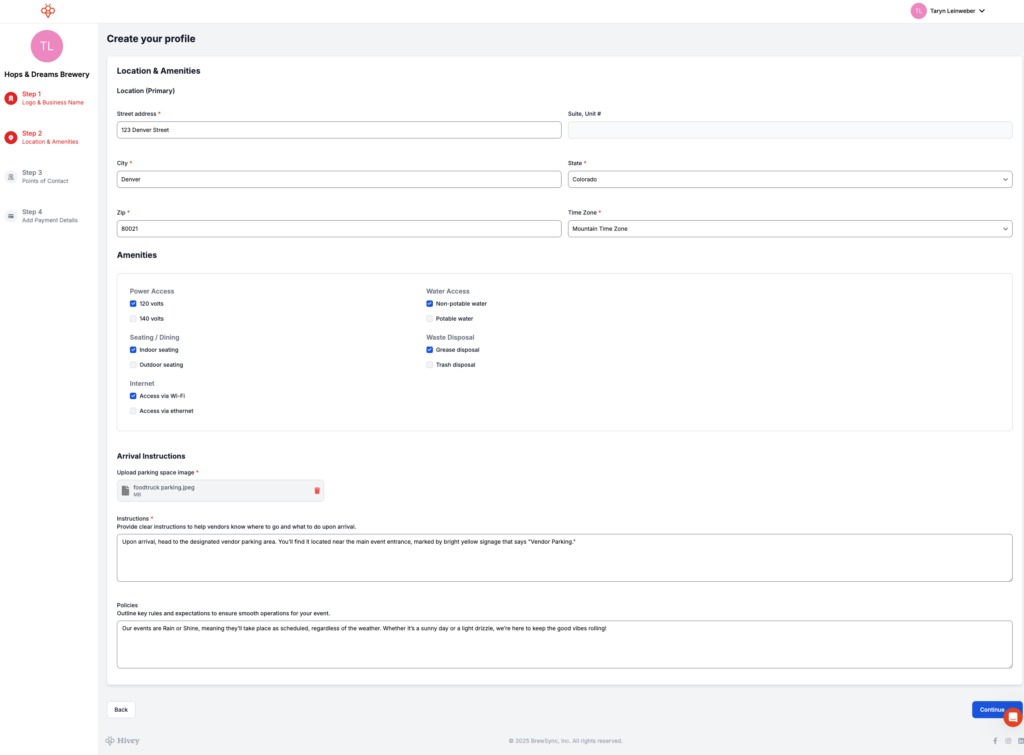
Step 2: Location & Amenities
- Fill in the details of your address and timezone in the *required fields.
- Check mark the amenities your location offers so Vendors know what to expect and prepare for when scheduling with you.
- Upload an image of the Vendor space by clicking the “Choose File” button and selecting the file from your computer. Accepted file types are JPG and PNG.
- In the Instructions text box, provide specific details on where the Vendor space is located at your Venue.
- In the Policies section, include any important information Vendors need to know about your event or space.
- When you’re ready, click the “Continue” button in the bottom right corner to proceed to Step 3.
🐝 Hivey Tip: Be as detailed as possible when providing directions to the Vendor parking space and ensure all amenities are accurately listed. This will help attract Vendors that are the best fit for your location and make it easier for them to find and access the designated area!
Step 3: Points of Contact
- Enter the primary point of contact in the *required fields. To add more contacts, click the “Add Additional Contact” button and complete the *required fields for each.
- Email Notifications are pre-selected, ensuring you’ll receive updates for all listed notifications. (P.S. Text Notifications are coming soon!)
- Once everything is filled out, click the “Submit” button in the bottom right corner.
🐝 Hivey Tip: Be sure to add individuals who will be on-site during events as the main point of contact for Vendors to communicate with directly!

Step 4: Add Payment Details
- Add in your payment details with the card you would like to keep on file.
- Your free trial will be added in, and you won’t make a payment until your trial ends.
- Click the Pay Now button to complete your account setup!
🐝 Hivey Tip: Double-check your card details before submitting to avoid any issues with payment processing.

